30 Nisan 2014 Çarşamba

Briam or Greek Roast Vegetables


This dish is perfect for many reasons. A: It is very healthy and light. B: It cleans your fridge, any leftover vegetables, bits and pieces get used up. C: It is the easiest dish to make. D: And, it keeps for three four days in the fridge and gets better each day. Briam is a dish that I learned from my husband. In Greece, this is a very traditional side dish that can go with chicken or meat dishes. There is no set recipe because you can use any vegetables you like. However there has to be these ingredients: Tomatoes, garlic, onion, olive oil (plenty), feta cheese and thyme or oregano (or both). This is the basic of the dish, you can then add any type of vegetables you like and think that would go well together. In the summer courgettes, aubergines, onions and tomatoes, with a bit of potatoes are the best combination. In this recipe, I used mostly winter vegetables, and some summer vegetables like courgettes. Chop them in big pieces, throw into a deep oven dish, pour generous amount of olive oil, crumble some cheese inside and your briam is ready to go. Eat and enjoy!

Ingredients:
1 big onion
3 big tomatoes
6-10 cloves of garlic
3 leeks
1 small bunch of cauliflower
10-12 mushrooms
2 courgettes
A glass of tomato juice or tomato paste mixed in water
2 teaspoons of thyme
Pinch of salt
1/2 glass of extra virgin olive oil
Fresh rosemary (optional)
A chunk of feta cheese
Some parsley leaves (to sprinkle over the top)

How to:

1. Take out a deep oven dish/tray; wash and clean the vegetables; chop them into big chunks; throw all of them into the dish.

2. Add the tomato juice, olive oil, thyme, rosemary, garlic cloves, salt, pepper and mix well. Cover the top with aluminum foil or the lid of your dish and put into the 200 degree oven for half an hour.

3. Take the briam out of the oven, stir the vegetables to cover with tomato juice and olive oil if necessary; also add some more juice if necessary. The vegetables should not be dry. Then crumble some feta cheese on top, cover with your lid and put into the oven again for another 15 minutes.

4. The baking time depends on the vegetables you use in your briam. If you are following this recipe, the vegetables should be cooked and soft by now. Be careful, potatoes and carrots take longer than the other vegetables.

5. Sprinkle with some thinly chopped parsley and your briam is ready to serve. Eat and enjoy!
 This briam was made by our friend Artemis and served with a piece of baked chicken.
 Start with chopped vegetables. Do not tarry too much, big pieces are okay. =)

 Glass of tomato juice. In my case I mixed two table spoons of tomato paste with water and came up with this sauce.
 Almost ready to go in the oven.
Finishing touch... Thyme. Yum!

28 Nisan 2014 Pazartesi

Red Lentil Soup


This classical Turkish soup recipe is the easiest one I find. And it works perfectly every time. Follow my rations and you will end up with a thick, filling, delicious, savoury soup. Perfect for winter evenings or when you are ill; it can make your dinner on its own, with a few croutons. All you need is a deep pot and a hand blender. Oh, and only 25 minutes!

Ingredients:
Serves 4 - 5

1 cup of red lentils
5 cups of water or chicken or vegetable stock
1 big onion
4-5 cloves of garlic
1 table spoon of tomato paste
1 heap teaspoon of cumin
1 teaspoon of black pepper
1 teaspoon of (not so hot) chilli pepper
1 teaspoon of salt
1 teaspoon of dry mint
1 or 2 table spoons of butter
1 teaspoon of olive oil (for the bowls when you are serving)
1 or 1/2 a lemon's juice
Croutons

How to:

1. Using your cup to measure (for example I always use a plain glass), pour one cup pf lentils with five cups of water or vegetable or chicken stock (I rarely use stock and still the soup tastes amazing, so don't worry about it; of course if you make it with real / organic chicken stock it is always the best.)

2. Cut the onion into four big chunks and add into the soup along with the garlics unchopped. Then add the spices, cumin, salt, pepper, mint and some chilli pepper. Leave to cook until it boils.

3. Boil for five minutes, then put in low heat. Put the tomato paste in a glass and fill with hot water. Stir until it looks like a sauce and add it into the soup. Leave to simmer for another 15-20 minutes, until everything looks cooked and soft.

4. Turn the heat off, take your hand blender and blend the soup until it is smooth and incorporated. Add a knob of butter and some lemon juice before you serve.

5. When you take the soup into serving dishes/bowls, splash some olive oil for decoration. Eat and enjoy!

25 Nisan 2014 Cuma

Colourful Veggies Bread Pizza


  Making pizza out of stale bread is a very common technique. Sometimes we forget to do it but actually, it is one of the best comfort food you can prepare. It is easy and practical, also very flexible, you can put any type of ingredients you like. In my stale bread pizza, I went for the vegetable love again. I made some bacon to go with it. Chicken would also be a very good alternative. I wouldn't mind having this pizza all by itself, as it has loads of cheese. Just go inside your fridge, take out the bits and pieces of vegetables, add some chorizo, sausages, ham, prosciutto, chicken or anything you think will be fit for a pizza. No dealing with a dough, no rolling, no flouring... Only one important tip: Use a deep baking dish, not a flat tray. In order to turn the bread into a soft and gooey pizza dough, we are going to add some milk, an egg and olive oil. Let's start!

Ingredients:
Depending on the size of your baking dish

10 thin slices of stale white bread
4 table spoons of tomato puree and pepper puree (you can put 3 tomatoes and one big red pepper into a blender and mix until it makes a sauce) 
100 gr mushrooms
1 red pepper
1 green pepper 
1 small onion 
2 cups of milk
1 egg
A small bunch of spirng onions (to sprinkle over the top)
A small bunch of parsley (to sprinkle over the top)
Olive oil
Thyme
Black pepper
200 gr melting cheese (cheddar, mozarella, gruyere, any type of cheese you like on your pizza)

How to:
1. Thinly slice the bread. I had a whole bread, which made 10-12 slices. Line the bottom of your dish with the bread. My dish was a square sized one, so I could get four big slices that are enough for one person each.

2. In a separate medium size bowl, mix the milk, egg and two table spoons of olive oil, then pour a little bit more than half of it over the bread to soak.

3. Grate a thin layer of cheese on top and add another layer of bread and pour the rest of the milk mixture. If you think that two layers of bread will make the bottom of the pizza too thick, don't worry. Slice your bread very thinly, so when they come on top of each other, with the cheese in the middle, it will be just thick enough and very delicious. That is the whole point of this pizza. It is not a crispy flat bread, on the contrary, it is loaded vegetables on top of a soft cushion of bread. =)  One last thing, if you find the milk mixture is not enough, add some more milk and olive oil. If you have a big dish, use 2 eggs.

4. The rest is the easiest part. Spread the tomato and pepper puree generously on top of the bread. You can also use tomato paste instead.

5. Slice the red pepper, green pepper, onion, mushrooms and layer one by one. Cover the breads with vegetables so that the bread should not show. Then, top everything with grated cheese. Cook in a 200 degrees oven for 30-35 minutes, or until the cheese is melted and the bread looks golden.

6. For extra indulgence, add some more cheese after you take the pizza out of the oven. Sprinkle some chopped spring onions or chives and parsley. Share, eat and enjoy!


First the red peppers and tomatoes...
 Then the whiteness of the mushrooms and cheese...
 Some freshness with spring onions and parsley; here goes our colourful pizza!

24 Nisan 2014 Perşembe

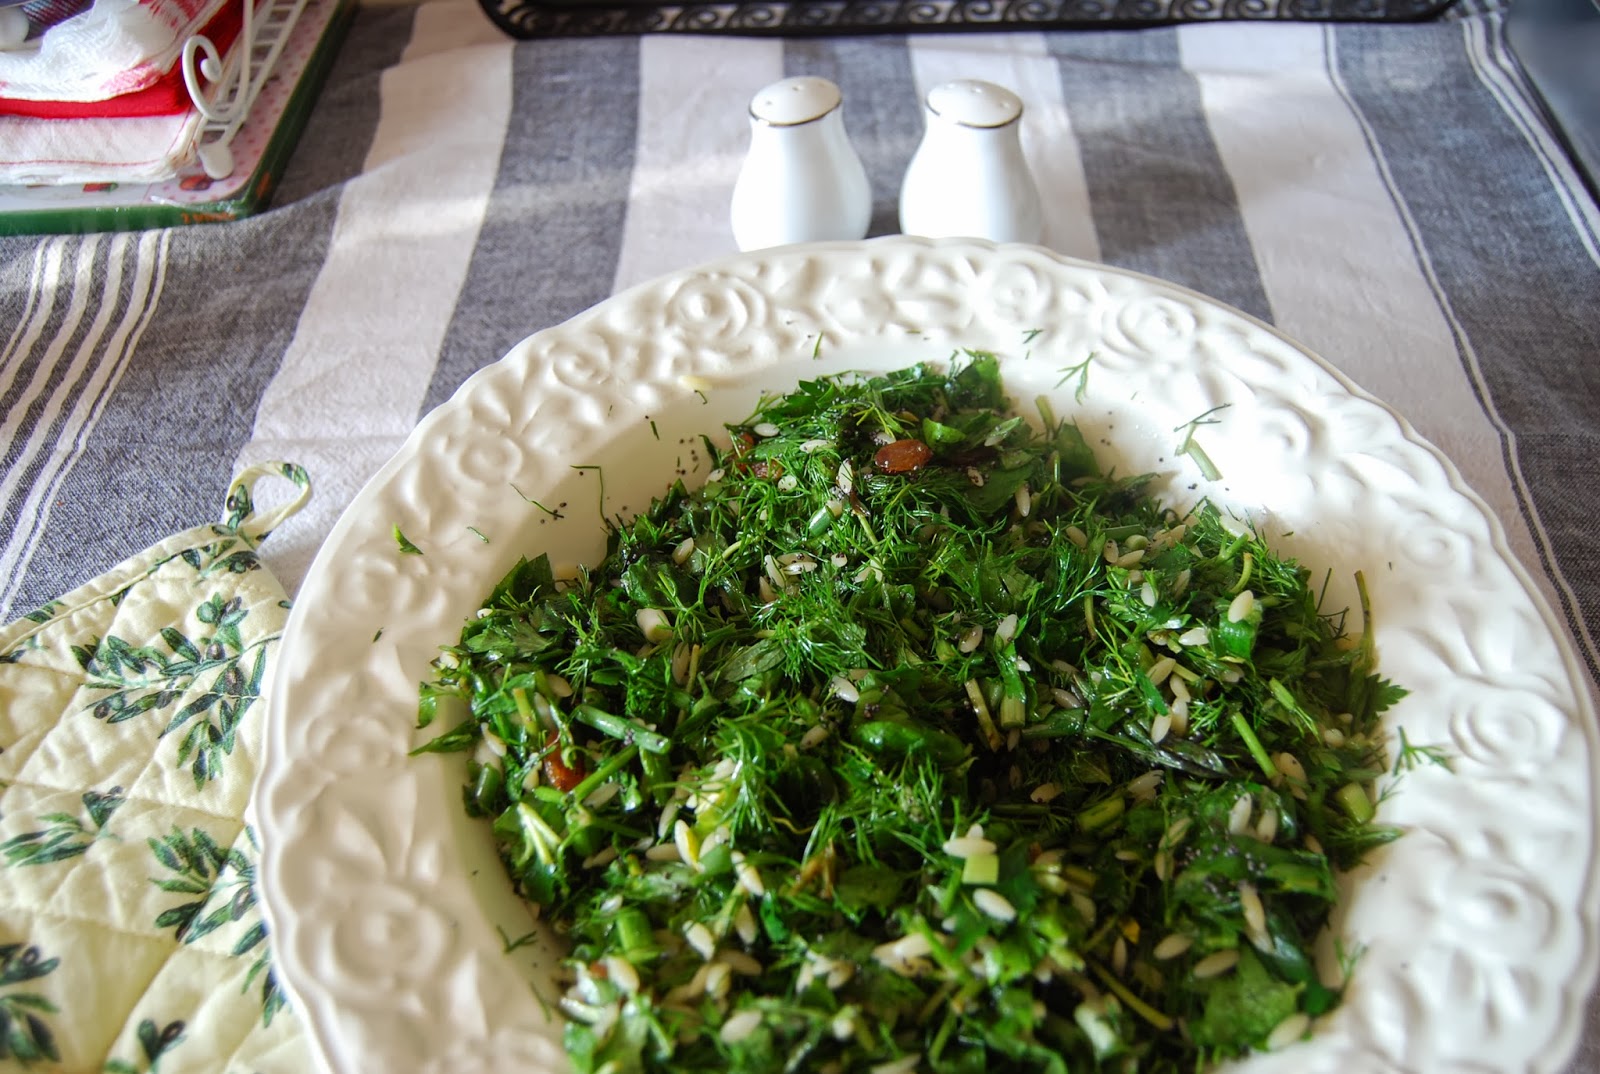
Three Herb Salad


So practical, healthy, low in calories, high in presentation looks, delicious and fresh salad recipe. Perfect for spring as the fresh herbs on the market are getting better and better. No need to prepare beforehand. This is not only a healthy salad, but it is also pretty filling because of the pomegranates. The dressing is made from sour pomegranate dressing, which is found in any market in Turkey. It is made from the sour pomegranate juice and it is a little bit sweet, too. You can use balsamic vinegar instead. I made this salad for my friends, so the recipes goes for 6-7 people. The only important thing is all the fresh herbs used have to be in the same amount. I used a bunch of each. Have this salad for lunch with a slice of grilled chicken and you will not be needing anything for the rest of the day.

Ingredients:
A big bunch of parsley
A big bunch of dill 
A big bunch of fresh mint  
A big bunch of spring onions  
1 big pomegranate 
1 cup of raisins  
1/2 cup of boiled orzo pasta
2 table spoons of poppy seeds
Juice of 1 lemon
Sour pomegranate dressing, olive oil, salt 

How to:
1. We begin with washing our herbs, parsley, dill, mint and spring onions. While waiting for them to drain, we boil a cup of orzo pasta. The whole point of this salad is that it is healthy, so we use very little orzo. If you like, you can add more but in my salad you can practically count the pasta.

2. Finely chop all the herbs once they are washed and clean. I separate half of the stems and throw them away, but I like including some of the stems of the herbs in my salad. As long as they are finely chopped, there is nothing wrong. They don't give a bad taste and they are good for you to eat as well.  It is up to you, of course.

3. Put all of the herbs and chopped spring onions into a large bowl, add the raisins and orzo and mix well.

4. Now the dressing, add the lemon juice, pomegranate sauce (or balsamic vinegar), generous splash of olive oil, salt, pepper, poppy seeds and stir everything.

5. Just before you serve, add the seeds of one big pomegranate on top. The flashy red of the fruit makes it really beautiful. Eat and enjoy!


23 Nisan 2014 Çarşamba

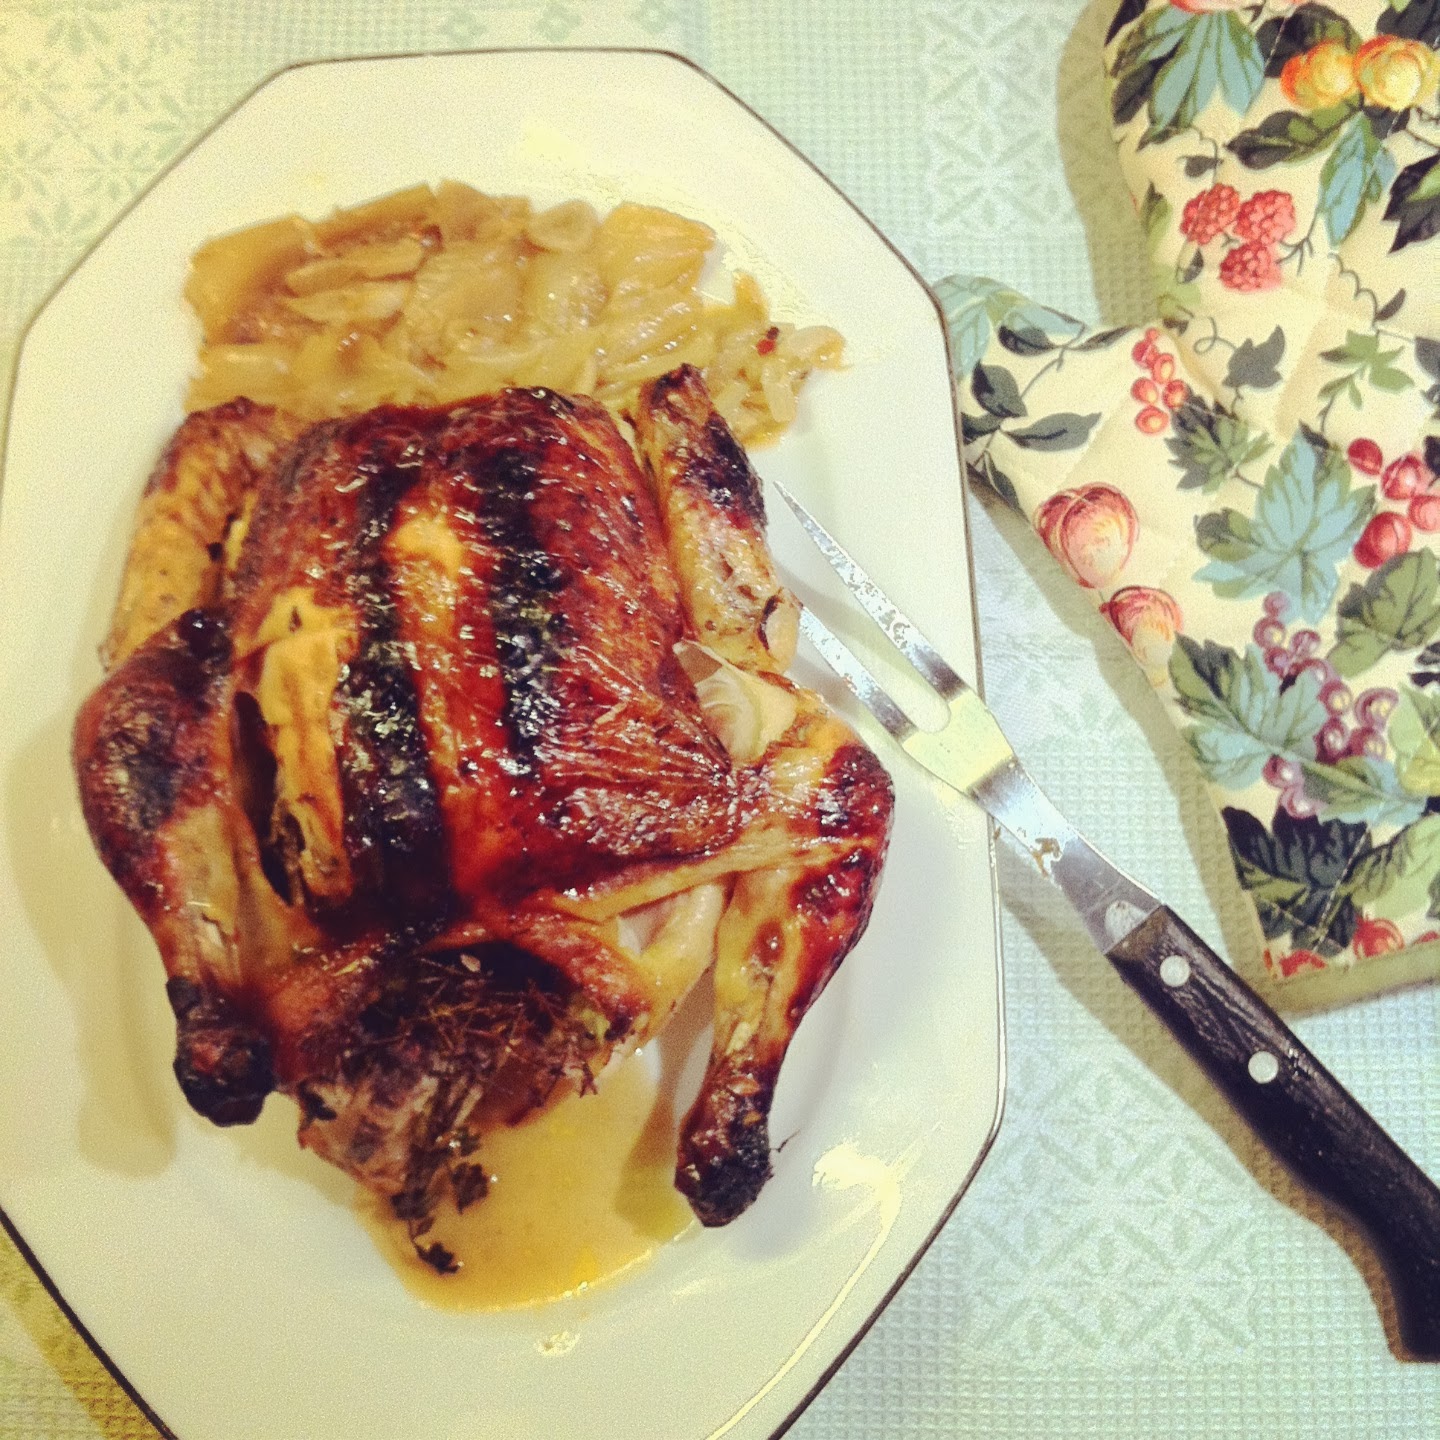
Simple Roast Chicken


For this weekend, I tried my simple whole chicken roast. I call it simple because it doesn't need too many ingredients and I make a very simple sauce to glaze my chicken. The whole point was to have a nice plate of comfort food: Succulent chicken falling off the bone with some couscous and roasted vegetables. I have to admit, I did a bit of cheating. Since it is the 'simple' chicken roast, it is also very easy and quick to make. In order to achieve this I used the oven bags. These bags are the best thing. Whenever I use them, the result is always wonderful and without any effort at all. The bag uses the oven and also the steam coming off from the meat/vegetables, at the same time spreads the sauce evenly. Baked potatoes in the baking bag is another of my favourite. But for now, I would like to start my recipe.

Ingredients:
1 whole chicken
1 big onion
5 cloves of garlic
A bunch of fresh thyme 
Salt, pepper, red peppercorns
Dried garlic and cloves for extra seasoning (optional)
2 table spoons of ketchup
2 teaspoons of honey
1 table spoon of vinegar
Olive oil
A baking bag big enough to put the chicken

How to:

1. We start with pouring some olive oil on the chicken that we put on our oven tray and season it well with salt and fresh ground pepper. 

2. We mix the other spices, red peppercorns, dried garlic, fresh thyme and anything else we might want to add in a bowl and then stuff them inside the chicken. This way, they will steam with the heat and leave their taste strongly.

3. In another bowl, mix the vinegar, ketchup and honey, then rub it onto the chicken and put your chicken inside the baking bag. 

4. Chop your onions and garlic, throw them in the bag with your chicken. Close the bag on one end and make 4-5 holes with a toothpick. Bake in the pre-heated oven of 200 degrees Celsius, for more than an hour, 70-80 minutes. You can adjust it according to your oven. 70 minutes in my oven made the chicken soft and juicy.

5. Once you are sure that the chicken is fully cooked, take it out of the oven to serve hot. Roast vegetables and couscous were our garnish.


Traditional British: Perfect Apple Crumble


Apple. My favourite fruit. Especially in autumn, when the first fresh red apples start to appear, it is almost a ritual for me to make apple crumble. Generally, you need to use sweet apples for this dessert, but if you are crazy for apples (like me) it really doesn't matter which type you use. Sometimes, I use green apples with red apples or yellow apples. I tend to mix them. Crumble is a traditional British dessert, especially made in the winter. Any type of juicy fruits can be used in this dessert. Pears, plums and cherries are the second best in my opinion. I even made a cherry and plum crumble. It was amazing. Sweet and sour, perfect with whipped double cream or vanilla ice cream. Imagine this: The house smells like delicious cinnamon and butter, you take the crumble out of the oven and immediately serve with cold ice cream. You take the first spoon  and see the steam coming out of the cooked apples while the ice cream is softly melting on top. Use my crumble topping to make  delicious desserts. It is so good! Crumble is not preferable in the summer, so before those heat waves hit us, try this mouth-watering indulgence. =)

Ingredients:
150 gr brown sugar
300 gr flour
5 medium sized cooking apples
200 gr butter
A pinch of salt  
2 tea spoons of cinnamon
1 tea spoon of ginger
Juice of 2 lemons
Juice of one orange
Grated rind of one orange or lemon (preferably orange)

How to:

1. First of all, take out the deep baking dish for your crumble. The deeper the dish, the juicer the dessert. Flat and wide trays are not suitable for this recipe because you want your crumble to be juicy. Remember, this is not a pie, it is a British crumble.

2. Squeeze the lemons and orange inside the bowl, add the cinnamon an rind of one orange. Next, wash and peel the apples. Peeling is not mandatory, but it is better if you do it. Chop the apples into small dice and put inside the bowl. Since they will be waiting inside lemon juice, they will not go brown.

3. For the crumble topping, we need room temperature butter. You should mix the butter and flour first by using your fingertips, and then add the brown sugar, cinnamon and ginger. Alternatively, you can put everything in a food processor and mix in high speed. Don't forget to add a pinch of salt to highten the flavours. 

4. Now the mixture looks like bread crumbs. Pur over the fruits in the bowl and press lightly with your palm. 

5. Cook in the pre-heated oven of 190 degrees Celsius for 40 minutes. When the topping is crispy and golden, the apples are soft inside the juice take it out of the oven.

6. Serve when warm in a small bowl with some ice cream or whipped double cream. Eat and enjoy! 


 Ready to go in the oven!
This is my plum and cherry crumble. If you like sourish sweet desserts, you should give this a try.


22 Nisan 2014 Salı

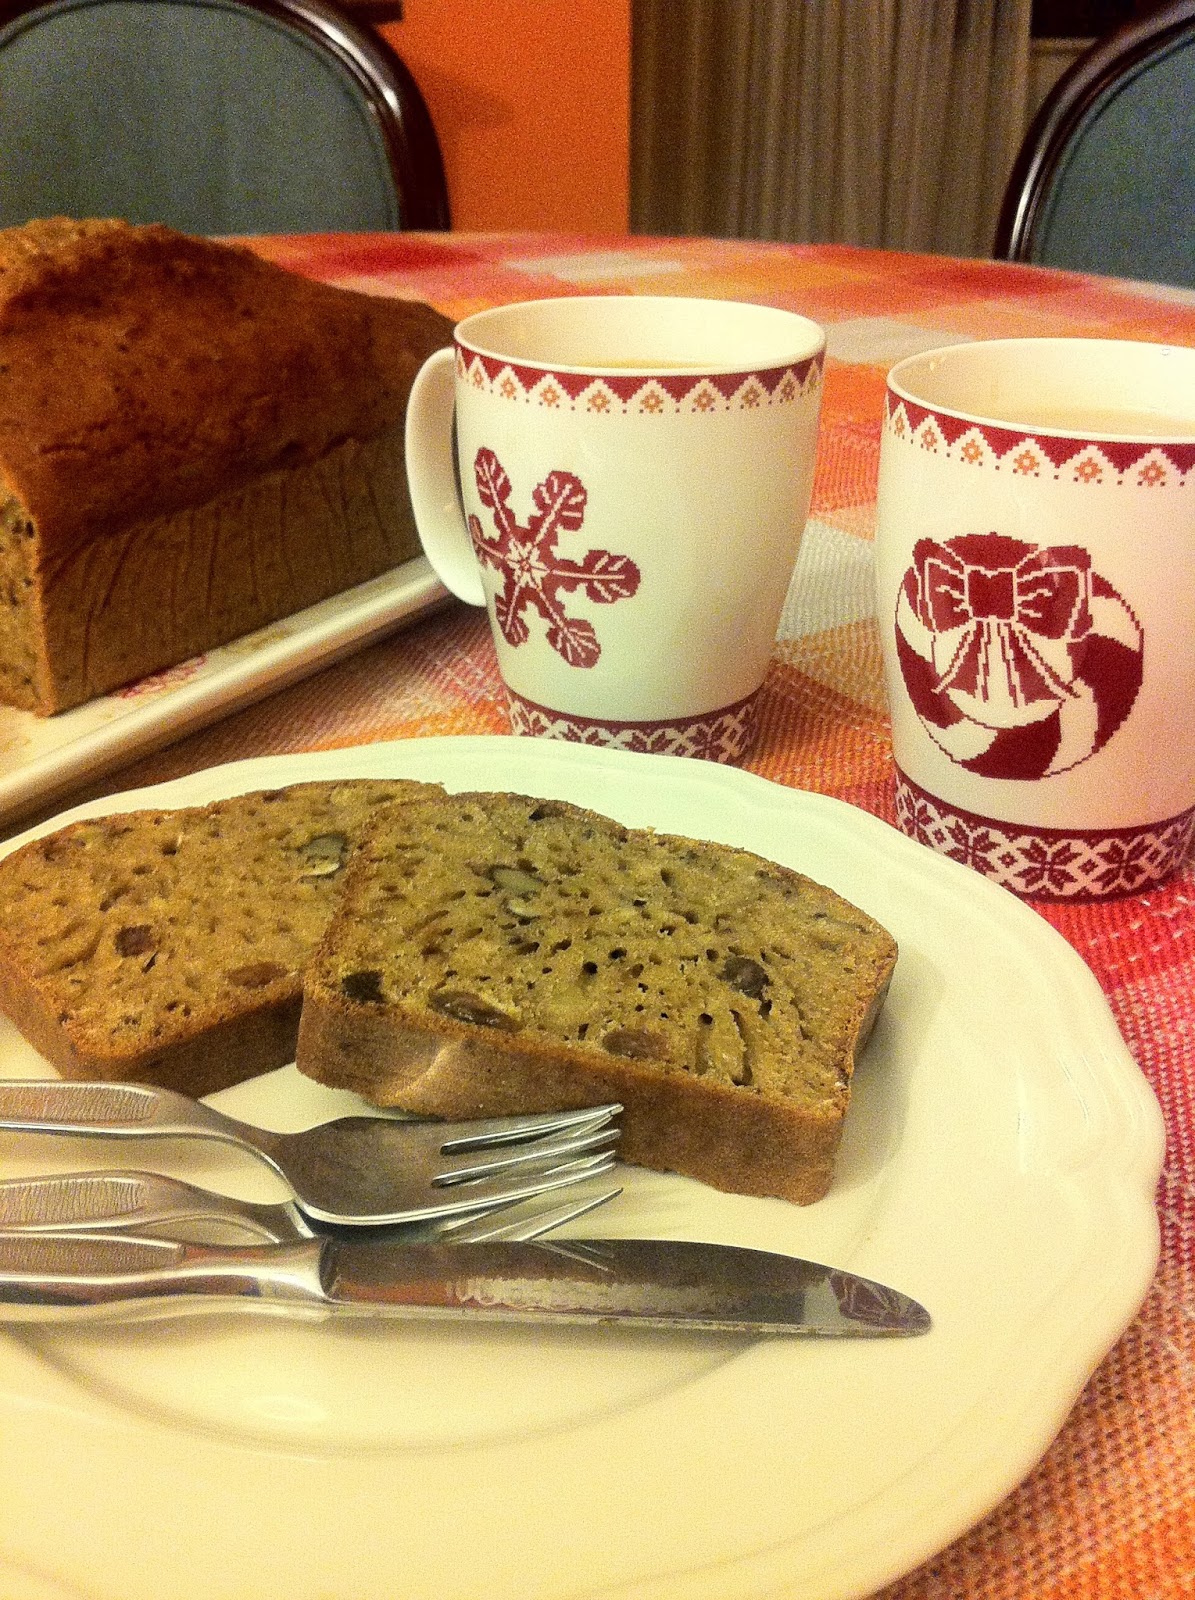
English Tea Bread or Bram Brack


This is a traditional bread I learned from my English mother-in-law. It is so yummy and light! It is commonly known as an Irish recipe -which is special to Halloween. Today I will share my take on the bram brack. I give it another name: English Tea Bread. Traditionally, it is made with only tea. However, in my cake mixture, I have a little bit of milk, plus walnuts and some cinnamon. The best thing about this cake is it has no oil in it. So, when you bake this bread, try to serve it when it is still warm, with butter and jam. It is perfect for your tea time. Make this cake and leave on your counter for a week, it will be fresh. It is pretty filling, so good for the young ones when they come back from school as well.  It is very easy to make. Although there is just one tip my mother-in-law told me. Before using the raisins or sultanas, soak them in tea for at least two hours. It is not compulsory but better to do it. :)

How to:
2 cups of strong brewed tea 
2,5 cups of flour
3 eggs
2 teaspoons of baking powder
2 cups of white sugar
1/4 cup of milk
1 cup of chopped walnuts
1 cup of raisins/sultanas
1 heap teaspoon of cinnamon

How to:

1. Soak the raisins in cold tea. Leave for at least a couple of hours. (You can do this one day before).  Brew some tea and leave it to cool. In the same way, you can use your leftover tea. =)

2. Mix all of the ingredients in a deep bowl, pour into a rectangular bread tin and bake for 50 minutes in 175 degrees.

3. Serve with butter and jam for tea. Bonne appetite!


It is still good with coffee the next day.